 NEWS 210904 about RaspEX Kodi 64-bit
I’ve made a new extra version of RaspEX Kodi 64-bit. This version is based on Raspbian (Raspberry Pi OS) and Debian Bullseye (Debian 11 stable). The LXDE Desktop is replaced with LXQt 0.16.0 which has a more “modern look” than LXDE. Historically, LXQt is the product of the merge between LXDE-Qt, an initial Qt flavour of LXDE, and Razor-qt, a project aiming to develop a Qt based desktop environment with similar objectives as the current LXQt. In RaspEX Kodi Build 210904 I’ve upgraded Kodi to version 19.1 Matrix since it has reached the “stable stage”. You can now much easier install extra repositories. Read about the best Kodi repos 2021.
NOTE: Build 210904 (64-bit) is missing the Netflix addon. Widevine CDM (which is necessary for Netflix to work) is not available natively on ARM64.
Boot problems as regards RaspEX Kodi Build 210904
If you can’t boot up the system after installing to the SD card using Rufus 3.15 in Windows it’s because the files /boot/cmdline.txt and /etc/fstab has the wrong content. I.e. the PARTUUID for the card is wrong. Then you’ll have to edit said files. Do it like this.
1. Start up a Linux system (Ubuntu or…).
2. Insert your SD card with RaspEX Kodi installed. It will be seen as /dev/sdb1 (boot partition) and /dev/sdb2 (root filesystem).
3. To find out the correct PARTUUID for /dev/sdb1 and /dev/sdb2 run the command blkid /dev/sdb1 respectively blkid /dev/sdb2
4. Now change to the correct PARTUUID in /boot/cmdline.txt and /etc/fstab on the SD card. Use Leafpad or Mousepad for that. Never LibreOffice writer!
The file cmdline.txt can look like this:
console=serial0,115200 console=tty1 root=PARTUUID=347a28ab-02 rootfstype=ext4 elevator=deadline fsck.repair=yes rootwait quiet splash plymouth.ignore-serial-consoles
The file fstab can look like this:
proc /proc proc defaults 0 0
PARTUUID=347a28ab-01 /boot vfat defaults 0 2
PARTUUID=347a28ab-02 / ext4 defaults,noatime 0 1
# a swapfile is not a swap partition, no line here
# use dphys-swapfile swap[on|off] for that
Study all installed packages in Build 210904…
Log in to LXQt or Kodi
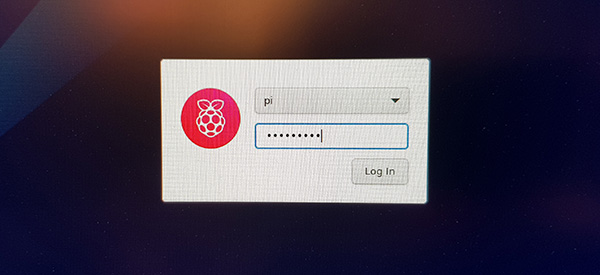
After the boot process is ready you will end up at LightDM‘s login screen. It will look like this – see below. Log in as pi with password raspberry or as root (“other”) with password root. You can log in to Kodi directly from LightDM if you want. While inside LXQt you can change to the Kodi Desktop environment. You can run Kodi on the LXQt Desktop like any other program or run it in full screen. Just change Kodi’s Settings from Windowed to Fullscreen. Watch this screenshot.
Expand the filesystem on the SD card
If you install many new big programs and/or download large files (for example videos) you may run out of space on the SD card. That is best fixed by running the following command: sudo raspi-config. Click on “Advanced Options” and choose A1 Expand Filesystem.
NOTE: That’s all you have to do. Just wait for the script to fix everything. If you use a SD card of 64 GB all the space on it will be used afterwards. Watch a screenshot when raspi-config is running.
1. Screenshot showing filesystem size before resizing
2. Screenshot showing filesystem size after resizing
API and Authentication keys
Google and Netflix make it more and more difficult to use the YouTube and Netflix addons in Kodi. They demand API and Authentication keys. As regards YouTube I’ve managed to solve the problem permanently. As regards Netflix you’ll have to create your Authentication key yourself. (Not as regards this version of RaspEX Kodi, since the Netflix addon can’t be used – see above). Follow this instruction.
1. Read this INFO site. Then do this:
2. Download NFAuthenticationKey_Linux.zip
3. unzip NFAuthenticationKey_Linux.zip
4. cd NFAuthenticationKey_Linux
5. Run the script with the command python3 NFAuthenticationKey.py – screenshot
6. Follow the instructions on the screen and save your Authentication key in /home/pi
7. Remember to take a note of the created four-digit PIN code
8. Open the Netflix addon in Kodi and choose to login with the the Authentication key you have created – screenshot
9. Find your Authentication key in /home/pi – screenshot
10. Give Netflix you password – done! – screenshot.
Your monitor/screen resolution
If you experience problems with the screen resolution you may have to make some changes in /boot/config.txt. The eight last lines in /boot/config.txt have the following content.
## exton
# Enable DRM VC4 V3D driver
# dtoverlay=vc4-fkms-v3d
dtoverlay=vc4-fkms-v3d,cma-344
max_framebuffers=2
arm_64bit=1
enable_uart=1
## exton end
My screen resolution is 3440×1440. If you have for example 1920×1080 you should change the line dtoverlay=vc4-fkms-v3d,cma-344 to dtoverlay=vc4-fkms-v3d,cma-192.
Used kernels
5.10.60-exton-v8l+ (for Rpi 4) and 5.10.60-v7+ (for Rpi 3 and 2).
Compatibility :: September 2021
Unfortunately not all systems made for Raspberry Pi 3 and 2 will run on the new Raspberry Pi 4 computer. They need to be upgraded with a new kernel. I therefore have to upgrade the systems I distribute. I.e. RaspEX, RaspEX with OpenCPN, exGENT, RaspEX BunsenLabs, RaspEX Kodi, RaspAnd Marshmallow, RaspAnd Nougat 7.1.2, RaspAnd Oreo 8.1, RaspAnd Pie, RaspAnd 10, RaspAnd 11 Build 210321, EXTON OpSuS Rpi, FedEX Rpi3 and RaspArch. I have until now (210321) only upgraded RaspAnd 11, RaspAnd 10, RaspEX, RaspEX Kodi, RaspArch, exGENT and RaspEX with OpenCPN. Read about the new Raspberry Pi 4.
SCREENSHOTS
1. The LXQt Desktop running as user pi
2. The LXQt Desktop running as root
3. Kodi 19.1 system info
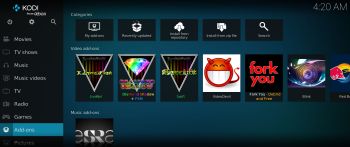
4. Kodi running showing some addons. (The Diamond Wizard repository is not included)
andex.exton.net – latest is AndEX 10 (with GAPPS) and AndEX Pie 9.0 (also with GAPPS)!
and
about my Android 11, 10, Pie, Oreo, Nougat, Marshmallow and Lollipop versions for Raspberry Pi 4 and 3/2 at
raspex.exton.se – latest is RaspAnd 11 (with GAPPS) and RaspAnd Oreo 8.1 (also with GAPPS)!


Leave a Reply