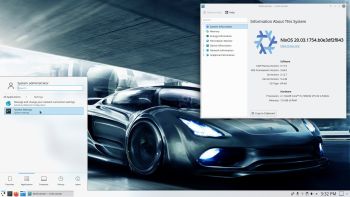
Category: Linux

PuppEX Focal64 (Puppy Linux) with kernel 5.9.9 (latest) compatible with Ubuntu 20.04 LTS :: Build 201121

NEWS 201126 ABOUT PuppEX Build 201121 and Nvidia
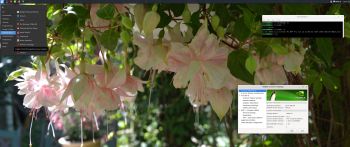
Today I’ve discovered that Nvidia’s Proprietary Graphics Driver can be installed in PuppEX Build 201121 after all! Not version 450.80.02, but version 455.45.01. Watch this screenshot. Read this Article about the Open-Source NVIDIA/Nouveau vs NVIDIA Proprietary Driver.  Read about how to install the driver...

ABOUT PuppEX Focal64 Build 201121
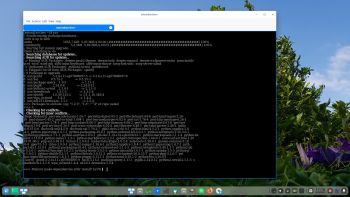
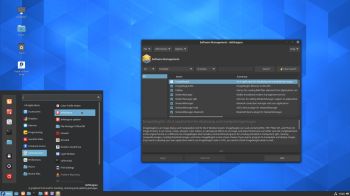
A new PuppEX Focal64 version with kernel 5.9.9 (latest) is ready today. Unfortunately it does not have Nvidia’s Proprietary Graphics driver 450.80.02 installed (as Build 201119 has). I could not find a patch for kernel 5.9. The good news is that this new version has the kernel sources for kernel 5.9.9. This means that VirtualBox Guest Additions can be installed by you. Which also means that you can run PuppEX in full screen in VirtualBox (among other things). Watch this screenshot. When running PuppEX Build 201121 in VirtualBox you shall first save your session. After a reboot you can install the Additions. When doing so you will get an error message saying failed to remove installed version filelist not found. Fix it by running the command rm /usr/sbin/vbox-greeter /usr/sbin/vbox-uninstall-guest-additions. Watch screenshot 1 and screenshot 2.

Screenshot: PuppEX Focal64 Build 201121 running Spotify

READ MORE…

Read about my Android-x86 Systems – 10, Pie, Oreo, Nougat, Marshmallow, Lollipop and KitKat at
andex.exton.net – latest is AndEX 10 (with GAPPS) and AndEX Pie 9.0 (also with GAPPS)!
and

about my Android 11, 10, Pie, Oreo, Nougat, Marshmallow and Lollipop versions for Raspberry Pi 3/2 at
raspex.exton.se
– latest is RaspAnd 11 (without GAPPS) and RaspAnd Oreo 8.1 (with GAPPS)!
2 Comments extonExton Linux SystemsLinux

RaspArch Rpi4 Build 201006 :: Run Arch Linux on your new Raspberry Pi 4 computer :: Install it using Rufus 3.11, Win32 Disk Imager or Etcher in Windows!

rasparch-logoRaspArch Build 201006 especially for the new Raspberry Pi 4 released in May 2020
This version (201006) is especially made for
the new Raspberry Pi 4, but it can of course also be used on a Raspberry Pi 3 Model B+, Raspberry Pi 3 Model B and Raspberry Pi 2 Model B.

RaspArch is a “remaster” of Arch Linux ARM. The original compressed system is of about 230 MB. After I have added the LXDE Desktop environment, PulseAudio, Firefox, Yay, Gimp and NetworkManager the system has increased a lot. RaspArch is a “ready-to-go” ARM system. It must be installed on a Raspberry Pi 4, Raspberry Pi 3 Model B+, Raspberry Pi 3 Model B or Raspberry Pi 2 Model B computer.

NEWS in RaspArch Build 201006
A new kernel – 5.4.69-1-ARCH. All included packages have been updated to the latest version as of 201006. I’ve also replaced Yaourt with YayYet Another Yogurt – An AUR Helper Written in Go. I came to know that Yaourt is dead. I.e. Yaourt is not being developed anymore. I have also installed PulseAudio. Finally the sound works very well in RaspArch. Nice if you like YouTube. I’ve also replaced Wicd with NetworkManager. It works better. NOTE: To be able to install Yay I had to install a lot of development tools.

More about RaspArch
When you have installed RaspArch to your Micro SD Card you can use the system like any other Arch Linux system. I.e. install new programs etc. Arch motto is KISS (Keep It Simple Stupid). RaspArch uses kernel 5.4.69-1-ARCH and the LXDE Desktop environment.

WHO should run Arch Linux/RaspArch?
My answer: The system fits the “advanced” Linux user/enthusiast, who would be willing to run an occasional command from time to time.

SCREENSHOTS
Screenshot 1 of RaspArch’s Desktop – logged in as archpi
Screenshot 2 of RaspArch’s Desktop – logged in as root

Screenshot 3 – Using Yay (while installing SMPlayer)
Screenshot 4 – Samba connection to a Windows computer
Screenshot 5 – showing that you can watch 4K videos using Firefox

READ MORE…

Read about my Android-x86 Systems – 10, Pie, Oreo, Nougat, Marshmallow, Lollipop and KitKat at
andex.exton.net – latest is AndEX 10 (with GAPPS) and AndEX Pie 9.0 (also with GAPPS)!
and

about my Android 10, Pie, Oreo, Nougat, Marshmallow and Lollipop versions for Raspberry Pi 3/2 at
raspex.exton.se
– latest is RaspAnd 10 (without GAPPS) and RaspAnd Oreo 8.1 (with GAPPS)!
No Comments Exton Linux SystemsLinuxRaspberry Pi

ArchEX (Arch Linux) with Deepin 20 BETA, LXQt 0.15.0, kernel 5.8.12-arch1-1, Yay and Calamares 3.2.17 installer – Build 200930

NEWS about ArchEX 200930
A new version of ArchEX is ready! In this new version, which I call ArchEX 2020, I have added the Deepin 20 BETA (latest) Desktop environment. Deepin (made in China!) is devoted to providing a beautiful, easy to use, safe and reliable system for global users. I came to like Deepin very much when I installed it in ExTiX 20.5 . So I thought why not install Deepin also in ArchEX?

REPLACEMENT
This version (200930) of ArchEX replaces version 200914, which couldn’t run on UEFI computers. I’ve also replaced Yaourt with YayYet Another Yogurt – An AUR Helper Written in Go. I came to know that Yaourt is dead. I.e. Yaourt is not being developed anymore. So in the new version of ArchEX I have fixed the UEFI matter, upgraded all included packages, installed a new kernel (5.8.12 – latest stable kernel by 200930) and replaced Yaourt with Yay.

Study all installed packages in ArchEX 2020 Deepin/LXQt.

SCREENSHOTS
ArchEX Deepin Desktop
ArchEX Deepin full Desktop
ArchEX running LXQt – just change from Deepin to LXQt before you log in
ArchEX using Yay

READ MORE…

Read about my Android-x86 Systems – 10, Pie, Oreo, Nougat, Marshmallow, Lollipop and KitKat at
andex.exton.net – latest is AndEX 10 (with GAPPS) and AndEX Pie 9.0 (also with GAPPS)!
and

about my Android 10, Pie, Oreo, Nougat, Marshmallow and Lollipop versions for Raspberry Pi 3/2 at
raspex.exton.se
– latest is RaspAnd 10 (without GAPPS) and RaspAnd Oreo 8.1 (with GAPPS)!
No Comments Exton Linux SystemsLinux

Exton|Defender SRS based on Fedora “Rawhide” (upcoming Fedora 33) with Cinnamon 4.6.4 and kernel 5.8-rc1 :: Install to USB with persistence! :: Build 200623

About Exton|Defender SRS (Super Rescue System) Build 200623
Exton|Defender SRS is a Linux system available as a Live USB/DVD based on Rawhide (upcoming Fedora 33), 64bit – version 200623 – for administrating or repairing your system and data after a crash. Exton|Defender aims to provide an easy way to carry out admin tasks on your computer, such as creating and editing the hard disk partitions. It comes with a lot of Linux software such as system tools and basic tools (editors, Midnight Commander, Network tools). Exton|Defender can, however, also be used as a normal Linux Desktop System. It requires no hard drive installation, but can be installed to hard drive if you want. Desktop environment: Cinnamon 4.6.4. Kernel: 5.8-rc1.

What’s new in kernel 5.8?

System Tools included
NTFS-3g, GParted, PartImage, Shred, Sfdisk (util-linux-ng), Rsync, Ddrescue, FSArchiver, TestDisk and Midnight Commander. Other programs (among many others): NetworkManager, Firefox, Thunderbird, Samba, Emacs, Safecopy, kernel headers and many compilation tools. See a complete LIST of all installed packages 200623. (Exton|Defender version 200623).

Installation to a USB stick in Fedora or Ubuntu – with persistence!
Use the following command as root in Fedora:

time livecd-iso-to-disk –overlay-size-mb 2048 $EFI –format –reset-mbr exton-defender-fc33-64bit-cinnamon-2260mb-200623.iso /dev/sdX – screenshot when the command is running.
NOTE 1: Change X to b, d, e or… Check it carefully to avoid data losses. You must use the whole stick (for example /dev/sdb) not a partition (for example /dev/sdb1).

NOTE 2: After a few changes you can also use the above command also in Ubuntu. Read more about it…
NOTE 3: The above command is the only one that actually works. And you can’t use Fedora Media Writer (or any other program with a GUI (if you want persistence).
NOTE 4: If you don’t have an installed Fedora system on your computer you can run Exton|Defender from a DVD and install to a USB stick using the command above. Or run Exton|Defender from one USB stick and install on another USB stick.

SCREENSHOTS
Screenshot 1 of Exton|Defender´s Cinnamon 4.6.4 Desktop
Screenshot 2 – installation of Google Chrome
Screenshot 3 – Netflix is running

READ MORE…

Read about my Android-x86 Systems – 10, Pie, Oreo, Nougat, Marshmallow, Lollipop and KitKat at

andex.exton.net – latest is AndEX 10 (with GAPPS) and AndEX Pie 9.0 (also with GAPPS)!
and
about my Pie, Oreo, Nougat, Marshmallow and Lollipop versions for Raspberry Pi 3/2 at

raspex.exton.se – latest is RaspAnd Pie 9.0 (without GAPPS) and RaspAnd Oreo 8.1 (with GAPPS)!

No Comments extonExton Linux SystemsLinux

DebEX Budgie/Enlightenment – Build 200618 – with Budgie Desktop 10.5, Enlightenment 0.23.1, Refracta Snapshot, Nvidia Graphics driver 440.82 and kernel 5.7.2-exton

About DebEX Barebone Budgie/Enlightenment, DebEX Gnome and DebEX KDE Plasma Linux 64 bit
All three systems/distributions are a based on Debian Buster (10) and Debian Bullseye/Sid (upcoming Debian 11). Budgie Desktop 10.5 and Enlightenment 0.23.1 are used as Desktop environments in DebEX Barebone/Budgie/Enlightenment. Gnome 3.30 is used in DebEX Gnome. KDE Plasma Desktop 5:14 is used in DebEX KDE. The system language is English (in all three versions of DebEX).

NEWS 200618 about DebEX Budgie/Enlightenment – a Refracta Build
A new version of DebEX Barebone with Budgie Desktop 10.5, Enlightenment 0.23.1 and kernel 5.7.2-exton (equivalent to Kernel.org’s second latest kernel 5.7.2) is ready. All packages have been updated to the latest version as of June 18, 2020. DebEX Barebone is now based on Debian Buster (Debian 10.4). I have installed Nvidia‘s latest proprietary Graphics driver 440.82. It will automatically be used if your computer has support for it.

Most important Changes
I’ve added Enlightenment 0.23.1 as an extra Desktop environment. That makes this version of DebEX unique, since there is no other live distro with Enlightenment 0.23.1 installed. Version 0.23.1 (released 190926) is not yet included in Debian’s repositories. I’ve thus installed Enlightenment 0.23.1 from source. The ISO is of only 1520 MB, which makes it easy to run the system live from RAM. That ability allows DebEX Budgie/Enlightenment to be very fast, since reading and writing data from/to RAM is much faster than on a hard disk drive. You can use the Calamares 3.2.4-3 Installer Framework to install DebEX Budgie/Enlightenment to your computer in any language. You can even use Calamares in VirtualBox and VMware – i.e. non-efi computers. Watch this animated GIF. NOTE also: When starting up DebEX Budgie/Enlightenment and entering the Enlightenment 0.23.1 Desktop you will get an error message as this screenshot shows. The error is fixed by running the following commands: chmod 777 .cache/efreet and sudo chmod 777 /root/.cache/efreet. After installing DebEX to hard drive you won’t get any error messages.

SCREENSHOTS
1. The Budgie Desktop for the ordinary user user
2. The Budgie Desktop for root
3. The Enlightenment Desktop for user user
4. The Boot menu when running DebEX live
5. The Boot menu when running DebEX from hard drive
6. The Enlightenment Desktop for root
7. A Samba connection in DebEX Budgie/Enlightenment

READ MORE…

Read about my Android-x86 Systems – 10, Pie, Oreo, Nougat, Marshmallow, Lollipop and KitKat at

andex.exton.net – latest is AndEX 10 (with GAPPS) and AndEX Pie 9.0 (also with GAPPS)!
and
about my Pie, Oreo, Nougat, Marshmallow and Lollipop versions for Raspberry Pi 3/2 at

raspex.exton.se – latest is RaspAnd Pie 9.0 (without GAPPS) and RaspAnd Oreo 8.1 (with GAPPS)!

1 Comment extonExton Linux SystemsLinux

Multiboot Linux live with Ventoy – “A New Bootable USB Solution” :: 200524

Ventoy 1.0.11 with persistence support was released yesterday (200523). I’ve tested Ventoy today.

What is Ventoy?
Ventoy is an open source tool to create bootable USB drive for ISO files. With Ventoy, you don’t need to format the disk again and again, you just need to copy the iso file to the USB drive and boot it. You can copy many iso files at a time and Ventoy will give you a boot menu to select them (screenshot). Both Legacy BIOS and UEFI are supported in the same way.

My test of Ventoy in Windows
I followed these steps.
1. Downloaded ventoy-1.0.11-windows.zip and unzipped it.
2. Inserted a USB stick of 32 GB (Corsair Voyager).
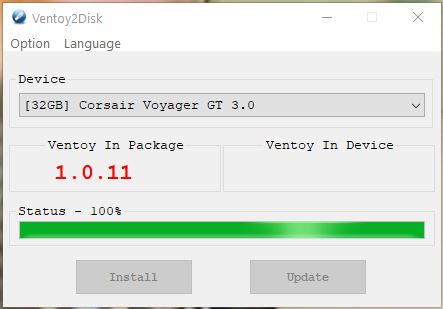
3. Opened the folder ventoy-1.0.11 and started Ventoy2Disk.exe for installing Ventoy to the USB stick. It looked like this.

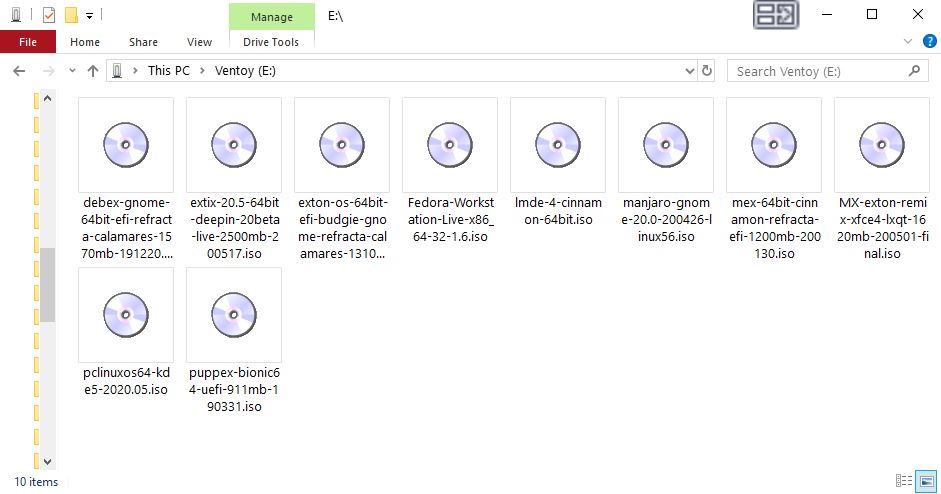
4. Then I copied ten (10) different Linux systems to the stick – see the list below. It looked like this.

5. Then I rebooted my computer and tested each system. All of them worked very well. NOTE: Not all Linux systems will work (be bootable). You can just test the ones you want on your USB stick. If one doesn’t work you can just delete the ISO from the stick and try another ISO file.

The ISO’s I put on the stick
1. DebEX Gnome Build 191220
2. ExTiX 20.5 Deepin Build 200517
3. Exton|OS Budgie Build 200319
4. Fedora 32 Build 200428
5. Linux Mint Cinnamon 19.3 Build 2019
6. Manjaro Gnome Build 200426
7. MeX Linux Cinnamon Build 200130
8. MX Linux Exton Remix Build 200501
9. PCLinuxOS KDE5 Build March 2020
10. PuppEX Bionic 64 Build 190331

My conclusion
Ventoy works very well. Using Ventoy is so simple that a ten year old child can do it. Ventoy also makes my MultiBootCD expendable.

SCREENSHOTS
1. Ventoy’s boot menu
2. My “installed” ISO’s


Read about my Android-x86 Systems – 10, Pie, Oreo, Nougat, Marshmallow, Lollipop and KitKat at

andex.exton.net – latest is AndEX 10 (with GAPPS) and AndEX Pie 9.0 (also with GAPPS)!
and
about my Pie, Oreo, Nougat, Marshmallow and Lollipop versions for Raspberry Pi 3/2 at

raspex.exton.se – latest is RaspAnd Pie 9.0 (without GAPPS) and RaspAnd Oreo 8.1 (with GAPPS)!

No Comments extonLinux

ExTiX Deepin 20.5 Live based on Deepin 20 Beta (latest) with Skype, Spotify, Refracta Snapshot and kernel 5.7.0-rc5 :: Build 200517

NEWS 200517 ABOUT ExTiX Deepin
I’ve released a new version of ExTiX Deepin today (200517). This ExTiX Build is based on Deepin 20 Beta released by Deepin Technology 200415.

NEW FUNCTIONS etc

1.You can run ExTiX from RAM. Use boot alternative 2 (load to RAM) or Advanced. A wonderful way to run Linux if you have enough RAM. Everything will be super fast. When ExTiX has booted up you can remove the DVD or USB stick.
2. You will have the opportunity to choose language before you enter the Deepin 20 Desktop. All main languages are supported.
3. I have replaced Deepin Installer with the Reborn version of Deepin Installer. Works better in every way.
4. I have replaced kernel 5.5.0-rc3-exton with kernel 5.7.0-rc5-exton. The latest available kernel from Kernel.org.
5. Spotify and Skype are pre-installed.
6. You can watch Netflix while running Firefox.
7. You can install ExTiX Deepin also in VirtualBox/VMware using Deepin Installer. (In previous versions you had to “chroot” into the install partition and install Grub).
8. Install ExTiX to a USB stick preferably with Rufus 3.10 in Windows.

UNIQUE
I may add that there is no other live version of Deepin 20 Beta.

SCREENSHOTS
1. ExTiX Deepin 20 Beta Desktop
2. Refracta Snapshot has started
3. ExTiX Deepin being installed in VirtualBox using Deepin Installer
4. ExTiX Deepin login screen (LightDM)
5. Movie showing how to enable Window effects

READ MORE…

Read about my Android-x86 Systems – 10, Pie, Oreo, Nougat, Marshmallow, Lollipop and KitKat at

andex.exton.net – latest is AndEX 10 (with GAPPS) and AndEX Pie 9.0 (also with GAPPS)!
and
about my Pie, Oreo, Nougat, Marshmallow and Lollipop versions for Raspberry Pi 3/2 at

raspex.exton.se – latest is RaspAnd Pie 9.0 (without GAPPS) and RaspAnd Oreo 8.1 (with GAPPS)!

No Comments extonExton Linux SystemsLinux

Things You Didn’t Know You Could Do With a Raspberry Pi – 200514

Things You Didn’t Know You Could Do With a Raspberry Pi
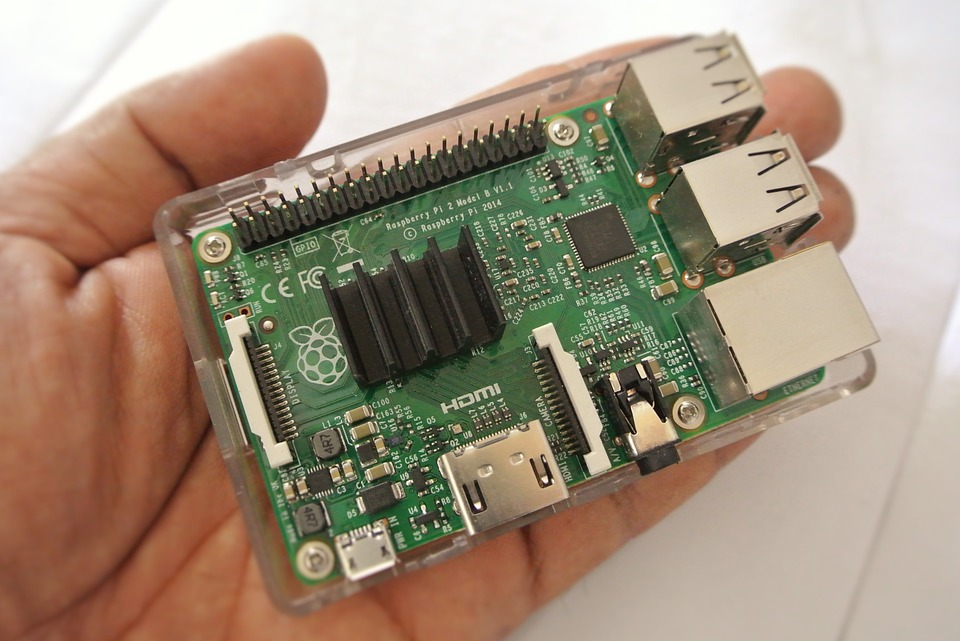
Originally conceived as an affordable and effective tool for bringing the computer age to depressed areas in the world, the Raspberry Pi has evolved into a device with its own niche tech following. The reason for this is simple: Whichever Raspberry Pi model you have in your hands right now, there’s almost no limit to the stuff you can do or create with this credit card-sized computer. With a powerful enough model, rudimentary knowledge of programming languages like Python or Scratch, and a wild imagination, you can find a range of fun and unique ways to utilize your Raspberry Pi.

Start a Radio Station
Broadcasting software such as PiFM or its simplified Make Magazine version can allow you to instantly start broadcasting on your choice of frequency. You’ll also need a basic antenna to amplify your signal and broadcast up to 300 feet away. The Verge outlines the process of physically riggin your Raspberry Pi for broadcasting, as well as the commands and software you need to start your own pirate radio at home.

Create a File-Sharing Network
This can mean a number of things. You can use the Samba/CIFS networking protocol in Windows devices to make files accessible to a number of remote users instantly. You can also turn your Raspberry Pi into a network attached storage device (NAS), which can make certain files or even different hard drives wirelessly available anywhere in your home. Either way, such systems can allow you to enable wireless file access in a small to medium-sized office. You can also use them to release a music album in a defined location, without the need for any physical exchange.

Design a PCB
A Raspberry Pi can be used to run a variety of printed circuit board (PCB) design software, from the simple KiCad PCB design tool to the much more complex Diptrace and Eagle. The better the software you can run, the more complex PCBs you can create. For instance, Altium notes how contemporary PCB router software allows engineers to get the job of finishing complex designs right the first time, which is difficult even for veteran designers. What used to take several weeks has been streamlined by this modern design software. The complexity of the PCB design software you can use generally depends on your ability to customize your Raspberry Pi.

Automatic Pet Feeder
Why buy one of those fancy and expensive automated pet feeders when you can turn your Raspberry Pi into one? Using a code and module he designed himself, David Bryan attached a system of computer-controlled servos to a food container to create an automated pet feeder from scratch. Programmable through WiFi, the feeder allowed him to leave home without worrying about his pets either starving or overeating. Bryan outlines the complicated process, along with the tools and materials needed, for anyone who wants to do the same.

Design Your Own Computer
Every Raspberry Pi is just a tiny computer with a bunch of missing parts that can be configured from anything that’s available. Perhaps the greatest example of this fact is programmer Jannis Hermanns’ Lego Mac which went viral in 2017, a Raspberry Pi reconfigured to look and actually kind of run like an even more adorable version of the first Macintosh computer. Inspired by a Lego session with her son, the programmer left the full instructions for her creation online, which in turn has inspired other would-be artists and engineers to create their own personalized versions.


CREDIT: KRITSADA JAIYEN, Pixabay – no changes made to image

No Comments LinuxRaspberry Pi

About NixOS – How to multiboot the system together with several other Linux systems and Windows :: 200507

What is NixOS?
NixOS is a Linux distribution with a unique approach to package and configuration management. Built on top of the Nix package manager, it is completely declarative, makes upgrading systems reliable, and has many other advantages.

I think NixOS is a very interesting and useful Linux system, but a bit difficult to handle, since it doesn’t work like any other Linux system. I.e. the installation to hard drive is very special, the file system is different and NixOS uses special commands, which you can’t use in any other Linux system. However, if you follow my instruction below you can install NixOS without messing up your current Grub boot configuration and finally enjoy NixOS running from hard drive.

INSTRUCTION
1. Download NixOS and install the ISO to a USB stick using Rufus 3.10 in Windows. Start up your computer from the USB stick
2. Install NixOS by following the NixOS Installation Manual
3. Add the lines below to /etc/nixos/configuration.nix and be sure not to install Grub during the NixOS installation. Open configuration.nix with Nano.

boot.loader = {

grub.enable = true;
grub.version = 2;
grub.device = “nodev”;
};

4. Reboot and start up the Linux system (for example Ubuntu) where you have Grub installed. Add the lines below to /boot/grub.cfg or
/etc/grub.d/40_custom

menuentry ‘NixOS’ {
boot.loader.grub.device = “nodev”;
set root='(hd0,X)’
configfile ‘/boot/grub/grub.cfg’;
}

NOTE1: You shall of course replace “X” with the correct number for your install partition. For example (hd0,6)

5. If something goes wrong you can always chroot (change root) into your NixOS partition. Do it like this.
A) Start up your computer from the NixOS DVD or USB stick and run the command mount /dev/disk/by-label/nixos /mnt
B) Then run the command nixos-enter
C) You can also do a manual chroot from any Linux system – watch this screenshot
D) Now you can install any extra (or missed) packages. Example: nix-env -i wireless-tools
NOTE2: When installing packages in chroot you may get an error message saying that the “Operation is not permitted”.
That can be fixed by adding the line nix.readOnlyStore = false to the end of /etc/nixos/configuration.nix.
NOTE3: While in chroot you may not get a Internet connection. That is fixed by editing /etc/resolv.conf. Add the line nameserver 8. 8.8.8. Open resolv.conf with the command nano /etc/resolv.conf.

Difficulties with NetworkManager
If you can’t get a Internet connection through WiFi when you have started NixOS from hard drive you should start up your computer from the DVD/USB stick again and chroot as described above.

A) Then install NetworkManager and NM-applet with the command: nix-env -i network-manager network-manager-applet

B) Edit /etc/nixos/configuration.nix like this – see below. (Open the file with Nano).

networking.wireless.enable = false;
## Only one daemon, wireless or networkmanager, could be ## enabled at the same time.
networking.networkmanager.enable = true;

C) Rebuild NixOS with the command:
nixos-rebuild switch –upgrade –show-trace

D) Reboot and start NetworkManager service daemon with the command: systemctl restart networkmanager
NOTE: The last command may not be necessary. If you see the NM-applet to the right in the panel just click on it and connect.

About multiboot with Grub
On the computer where I now have NixOS installed I also have nine (9) other Linux systems and Windows 10 installed. Study my Grub configuration (/boot/grub/grub.cfg). You may also find my instruction How To dual boot, triple boot or multi boot Linux with Windows in a simple way and be happy interesting.

Screenshots from my NixOS installation
1. The Desktop when running as root

2. The Desktop when running as an ordinary user
3. Spotify is running (install Spotify with the command: nix-env -i spotify)

Good luck! /exton

Read about my Android-x86 Systems – 10, Pie, Oreo, Nougat, Marshmallow, Lollipop and KitKat at

andex.exton.net – latest is AndEX 10 (with GAPPS) and AndEX Pie 9.0 (also with GAPPS)!
and
about my Pie, Oreo, Nougat, Marshmallow and Lollipop versions for Raspberry Pi 3/2 at
raspex.exton.se – latest is RaspAnd Pie 9.0 (without GAPPS) and RaspAnd Oreo 8.1 (with GAPPS)!
No Comments extonLinux

Run Android 10 on your PC :: AndEX 10 (Android-x86_64) with GAPPS (Google Play Store etc.), F-Droid, Brave Browser and Spotify :: Build 200218

NEWS 200218 – A new version of AndEX 10
I’ve uploaded a new upgraded version of AndEX 10 – andex-10-x86_64-gapps-fdroid-spotify-1180mb-200218.iso. I.e. all included apps have been updated to the latest version. Also Google Play Services and Google Play Store. The main reason for this new version is that I discovered that Google Chrome couldn’t run anymore. I have therefore replaced Google Chrome with Brave, which is an excellent Web Browser in many ways. At the same time I discovered a new very nice launcher – 3D Live Launcher. So it is of course included in AndEX Build 200218. Make it your standard Launcher. I’ve also added the app Google Play Games. Makes it easier to run games in AndEX.

Upgrade from version 200108 to 200218?
If you already have AndEX version 200108 up and running there is no need to acquire the new version. Just upgrade all apps to the latest version of today and you’re done! Use Google Play Store for that. You can of course also install Brave, the 3D Live Launcher and Google Play Games yourself.

READ MORE or download the ISO directly…

No Comments AndroidextonExton Linux SystemsLinux